

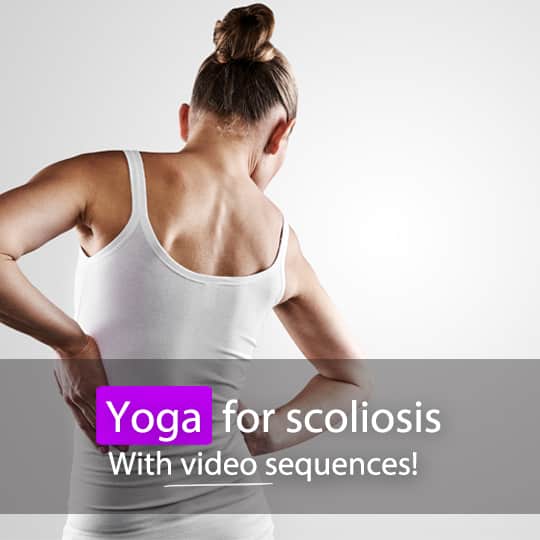
While most cases of scoliosis are relatively mild, the condition can become debilitating, especially if spine deformities develop during childhood, getting worse as a person grows. It’s important if you do have, or are developing, scoliosis to seek medical advice and to practice exercises to attempt to correct it. Yoga for scoliosis can be very beneficial, however, always seek advice from your doctor or physiotherapist before taking up any new exercise.
What Is Scoliosis?
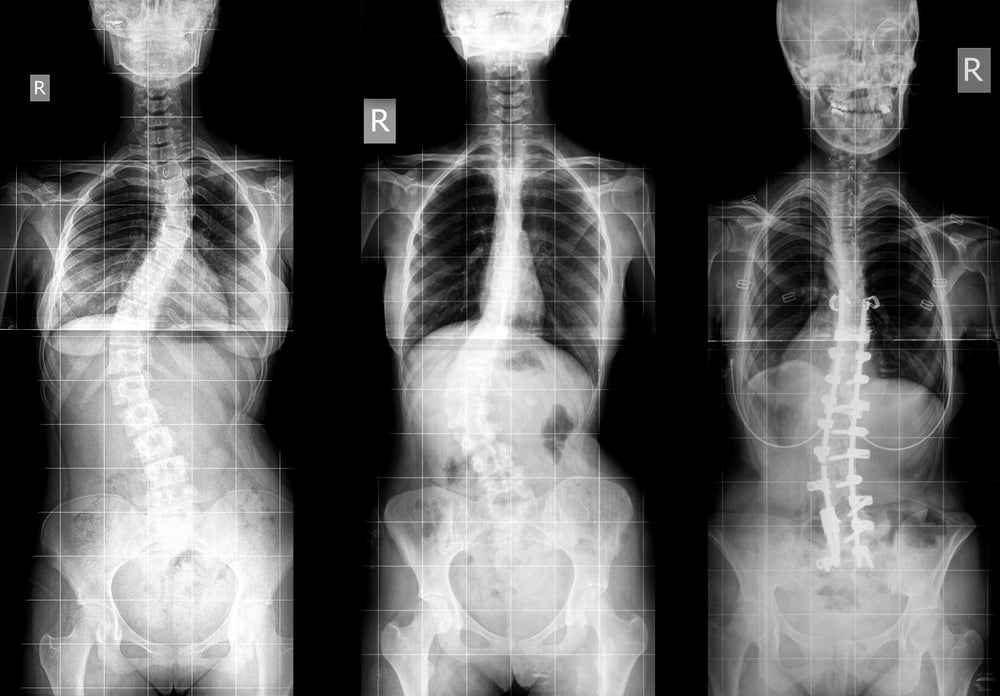
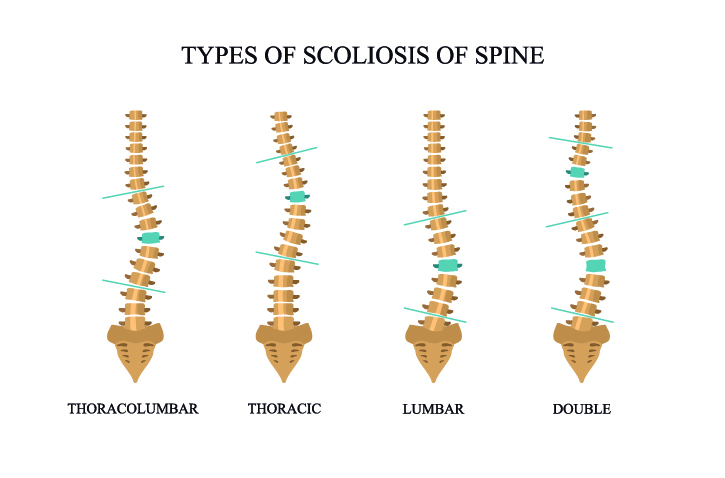
Scoliosis is the name given to spinal curvature. It is not a technical name or diagnosis, but rather a descriptive term, like headache. It describes a sideways bend in the spine, rotating along the vertical axis. The curve often develops in the shape of a ‘C’ or an ‘S’. It comes from the Greek word meaning ‘curved’ or ‘bent’.
What Causes Scoliosis?
There is no known cause for most cases of scoliosis. However, research indicates there are hereditary factors involved. The only conditions known to cause some cases of the curvature are cerebral palsy and muscular dystrophy. Symptoms of scoliosis can include uneven shoulders, an uneven waistline, or one hip higher than the other. It the curve worsens, the spine will then also twist or rotate. This can cause the ribs on one side of the body to stick out.
If scoliosis forms during childhood, it can become more severe as a person grows. This can lead to disabling scoliosis, causing lung functionality problems, due to compression, or limited space within the chest.
Yoga Poses For Scoliosis
Being a therapeutic form of exercise, yoga is beneficial to a number of ailments – scoliosis being one of them. Try these yoga poses and/or the video sequences below. But remember; always seek medical advice before trying new exercises. If you practice these poses and you feel any pain – even a little bit, stop immediately and consult your doctor. And if you already have a physiotherapist, they can create a Pilates or yoga sequence to best suit your needs.
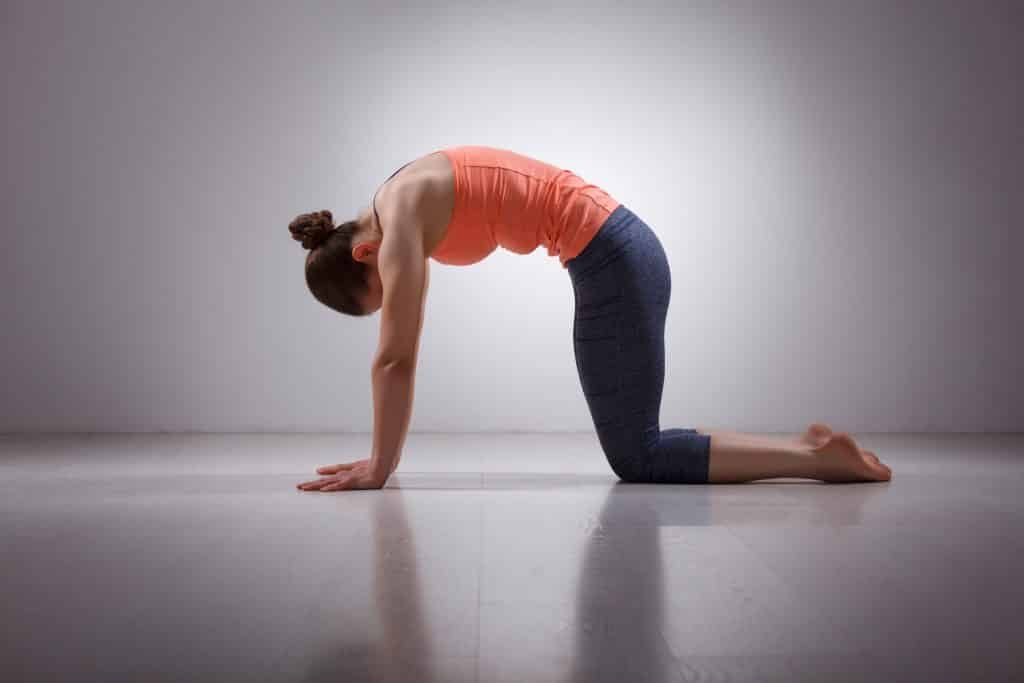
Cat-Cow Sequence
These two poses used together dynamically work really well to relax the back and release tension along the spine. Cow pose also strengthens the back a little. It is also a good mini sequence to slowly and gently warm up the back and core before moving into more challenging poses.
Start in tabletop position on your mat. If your knees feel sensitive or sore, place a blanket or extra mat underneath them. Make sure your knees are directly under your hips, and hip-distance apart, and your hands are directly under your shoulders, in line with your knees.

On an inhale, drop your belly down towards the floor gently (without jarring the back). Arch your back at the same time and lifting your tailbone towards the ceiling. If that feels good, you can gently lift your chin upwards. On an exhale, round your back, tilting your tailbone and head towards the floor. Repeat in sync with your own breath at least 10 more times.
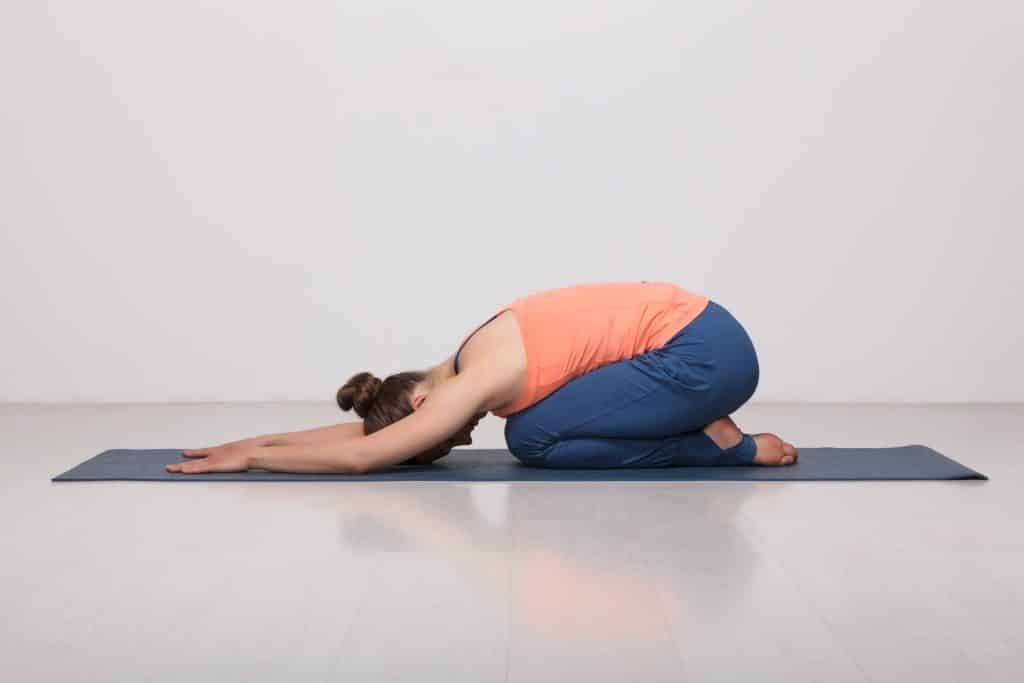
Child’s Pose
This posture releases tightness in the back and relaxes the muscles, decompressing the spine. It is a very restorative pose that relieves back and neck tension. Begin in tabletop position again with your wrists under your shoulders and knees under hips. On an exhale, sit your buttocks onto your heels. Your torso should rest on your thighs, or in between them for wide-angle child’s pose. Stretch your arms out in front to create more space along your back and sides. Rest your forehead on the mat if it can comfortably reach. However, if that forces your hips up away from your feet, place a folded blanket or cushion under your forehead. Because this is a restorative pose, you should stay in it for a couple of minutes.
Triangle Pose
This pose is great for decreasing stress, stimulating the organs and improving metabolism and digestion. However, it also stretches the spine, chest, shoulders, groin and hips, which is very beneficial to relieve and potentially help correct, scoliosis. However, while people who don’t suffer from scoliosis would practice this pose the same on both sides, scoliosis patients need to use different emphasis on each side to get the most out of it. When stretching towards the concaved side, the emphasis should be on lengthening the spine. This will help decompress the ribs and decrease the protrusion of the ribs on the other side. When stretching the other way, the emphasis should be on twisting to work on evening out the back.
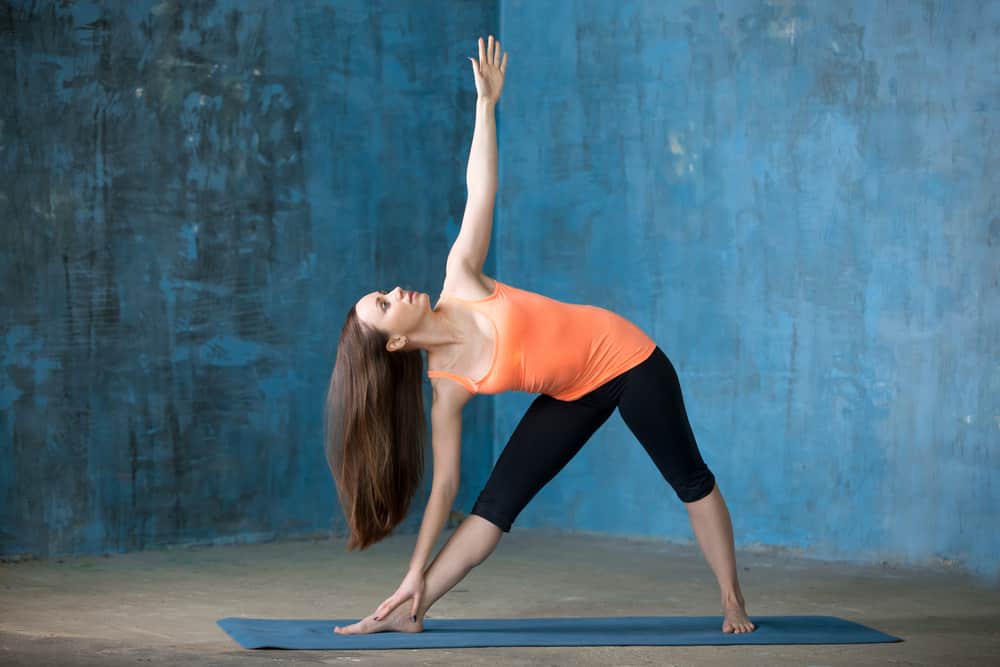
To practice triangle pose, stand with your legs wide, in a triangle shape. Point your toes on your front foot forward, with your back foot on a slight angle towards the outside of the mat. Line your front heel up with the middle of your back foot. Make sure your hips and shoulders are directly above your legs, not twisting towards the front. Keep your legs straight and inhale. As you exhale, gently hinge your torso and upper body towards the front of the mat, over the front foot. Bend your front arm towards your foot and you back arm towards the ceiling. Keep your body in a straight line, as if you are stationed in a narrow gap between two walls. That means keeping your chest open and avoiding tipping forward or downwards with your top shoulder, hip or chest. Only move your front hand down as far as it can comfortably go without bending your knee or tipping your body downwards. Stay in the pose for a few breaths and when you are ready to move out of it, tighten your core and lift up on an inhale. Repeat on the other side. However, remember those emphasis tips above when practicing each side!
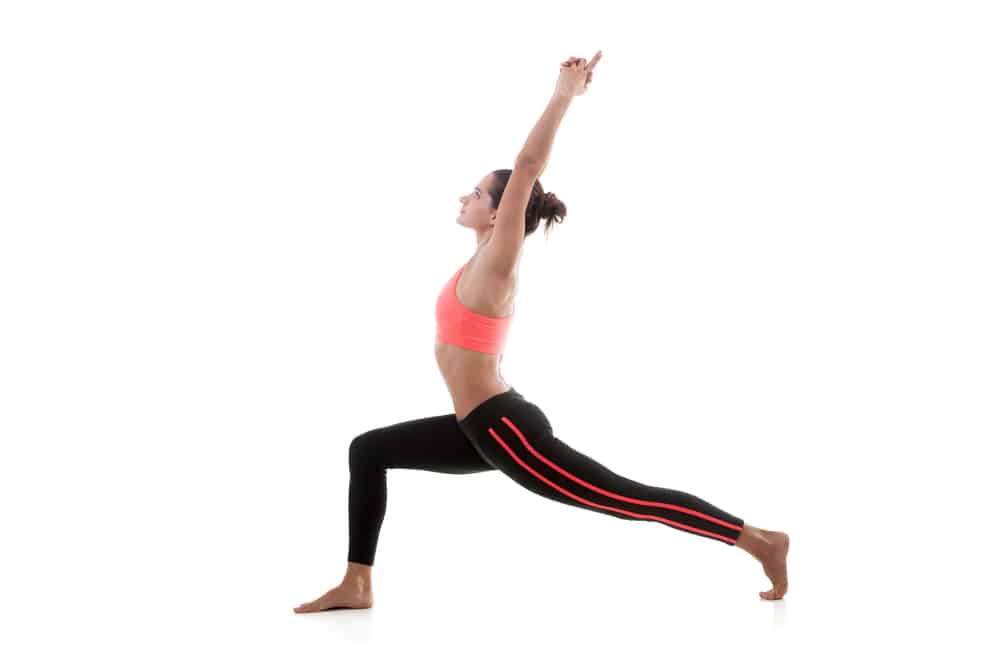
You can also do a lunged in between, which is also great for the spine, but very beneficial to your back, postural and leg muscles.
Side Plank
One of the best yoga poses for scoliosis is the side plank. It may not be a favorite posture for many, being a strength-reliant one. It may even feel more challenging if you suffer from scoliosis. Nevertheless, it is an extremely beneficial remedial pose for the condition. In order to reap its benefits, you need to concentrate on the side your spine curves. A 2014 study looked at 25 scoliosis patients with primary curves measuring 6 to 120 degrees. They were asked to perform side plank on the side of their curve for 10 to 20 seconds a day for the first week, and then for as long as possible each day (average of 90 seconds) during the next 6 or so months. Researchers found a “significant improvement” of around 32% in the curvature as a result.
Side plank is a variation of plank pose, which is pretty much known the ideal all-body strengthening and toning pose. It works on core strength – abdomen, oblique and back, as well as arms, shoulders, thighs, and neck and lower legs to an extent. But what we want to look at in relation to scoliosis is side plank. That still targets the core, but can also be used as a tool to help aid in the correction of a scoliosis bend, depending on where the curve is along your spine. Side plank also targets the oblique muscles more than in regular plank. The video below shows you how to move into side plank. You can either move into low side plank, with your lower arm on the floor, or high side plank, on your hand. Focus on the side that needs correcting.
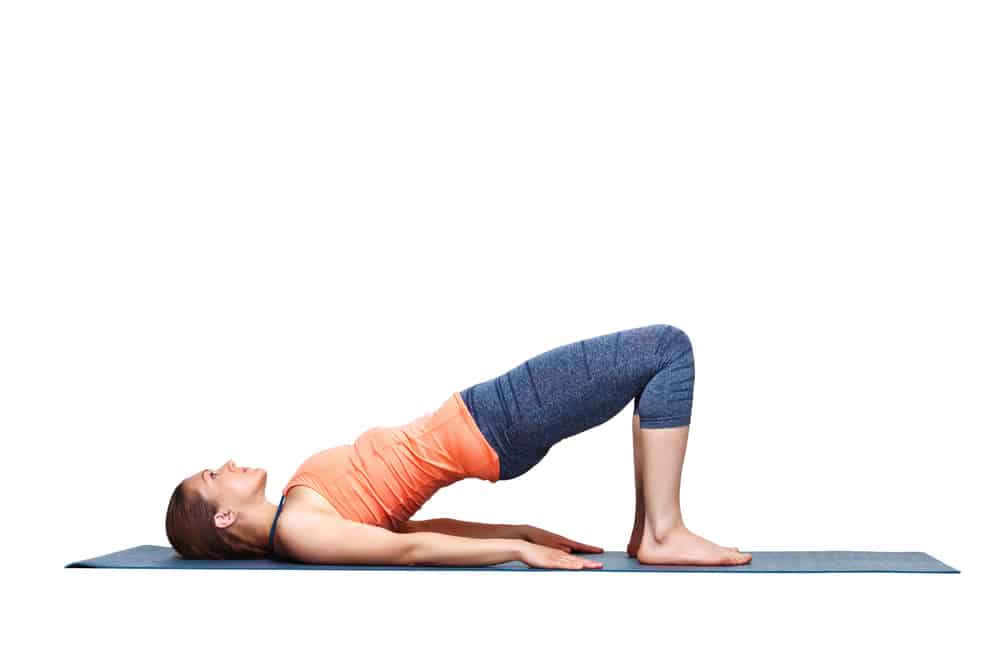
Bridge Pose
This pose is both restorative and strengthening at the same time. It stretches the core while increasing strength in the spine and back muscles. That’s because it encourages good posture and core control, strengthening the muscles that support the spine. There are a few variations of bridge pose, and to get the best out of it for scoliosis, it’s best to work more on the strength side of it, more so than stretching the front of the body.
Start by lying on your back with your knees bent, feet plated on the ground – hip-distance apart. Check that you can brush your heels with your fingertips. On an inhale, slowly lift your pelvis and lower back up towards the ceiling, pressing your hands into the mat. Take a couple of breaths and make sure the pose feels ok for you and that you haven’t got pain on one side or the other. If you do feel comfortable, you can lift yourself a little higher, lifting your middle back up off the mat and your pelvis further upwards. Take at least 5 long breaths, watching your belly rise and fall as you inhale and exhale.
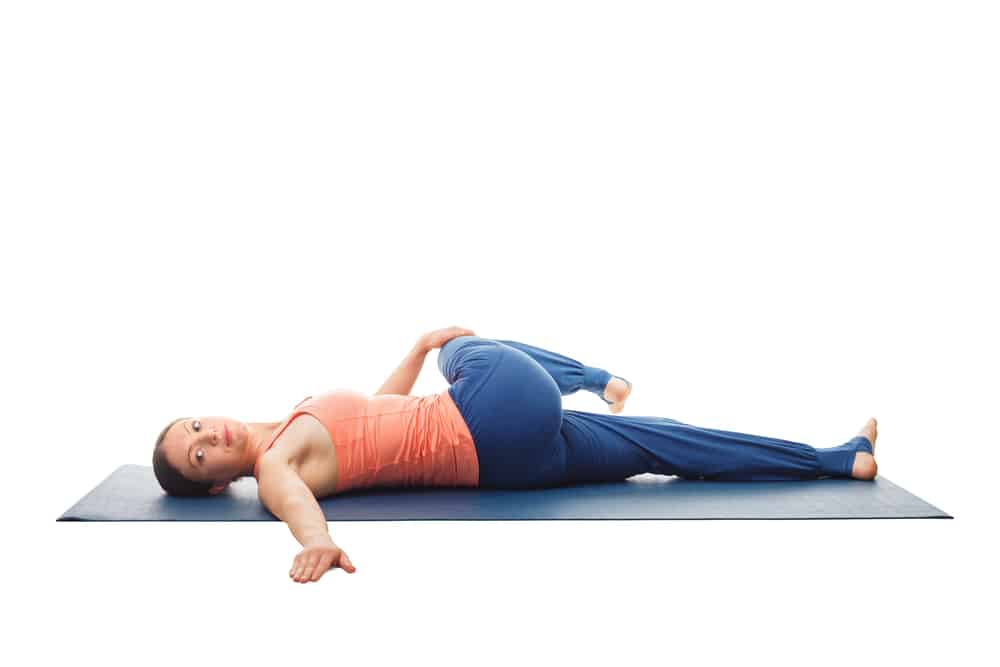
Universal Spinal Twist
This restorative pose relaxes the body, stretches the hips, glutes and outer thighs, and releases the back and spine, which is great for relieving scoliosis discomfort. Start lying on your back with your arms stretched out to either side so that you’re making a ‘T’ shape. Bend your right knee on an inhale and as you exhale, drop your knee to the left, twisting from the hips and spine. Keep both shoulders on the map and turn your gaze towards the right. You should feel a relatively deep stretch around your right hip and glut and along your spine. Stay in this pose for at least 10 long breaths and then move out of the pose. Repeat on the other side. If the pose felt more relieving on one side that the other, repeat on that side, or hold the pose on that side for a little longer.
Video Sequences
Stretching and strengthening is extremely important to increase your comfort if you live with scoliosis, and also to help correct it. This 20-minute sequence takes you through some very therapeutic poses, but also some powerful poses for strength. Just do what you can the first few times and work up to some of the more difficult poses and movements as your fitness and ability increases.
This next sequence uses yoga poses that lengthen the spine and strengthen the body’s postural muscles, which, as we mentioned earlier, is very beneficial to correcting and managing scoliosis. All the poses are also beginner’s poses, so even if you’ve never done yoga before, it’s a great one to start with!
This next video is a more Pilates-based routine. It focuses mainly on creating movement through the spine, which is very beneficial for scoliosis. The sequence is about 17-minutes long, with the first five minutes and the last five minutes in a seated position. This is a great sequence, because the instructor is a Physical Therapist and a Pilates instructor. It’s also beneficial because you repeat the first five minutes of exercises at the end to see if your body, and particularly, your back and spine, feels any better repeating the sequence at the end.
This ‘all levels yoga’ sequence to target scoliosis is another fantastic one I stumbled upon, because the instructor actually has scoliosis, so she knows what works best! It’s also a longer sequence, at 35 minutes, which is great if you want to have a decent workout and really target that curve.
This last sequence is a one-on-one session with a yoga therapist and scoliosis patient. Yoga therapists are trained to specifically target conditions like scoliosis, and this teacher says she has worked with a number of people who suffer severe scoliosis. Breathing is an extremely important part in managing and improving scoliosis, and quality of life when living with scoliosis. This sequence includes breathing techniques, which are hugely beneficial and highly recommended!